After the sulphur-printed test piece was etched in a 1:1 hot aqueous hydrochloric acid solution at 75 ° C, the low-fold structure was examined, and the result was loose > 4.0 grade, segregation > 4.0 grade, apparently exceeding GB 1979-1980 "structural steel The rating range of the Low-Body Organization Defect Rating Chart. The coarse segregation point is in the shape of a bead, and the small is in the shape of a curved sheet. The internal crack has a good correspondence with the crack pattern displayed on the sulfur print. There are several residual acid stains along the crack on the back of the test piece, indicating that the part The crack is penetrating. The dendrites in the inner crack zone are very coarse, indicating that the forging ratio of the bolt is too small.
Fracture test In order to further verify the metallurgical quality of the bolt material, four fracture samples (size 60 mm × 55 mm × 320 mm) were randomly placed on the broken bolts, and a V-notch was opened on one side, and then pressed on a test machine of 100 t. No flaws were observed in the fractures of the four fractured specimens. One of the specimens had visible gray-sand defects on the matching fracture surface. The torn gray inclusions appeared smooth and without metallic luster under oblique light. There are branches, and some areas can be "inner crack" zone low-fold structure 1.7 × fracture surface inclusion defects (oblique light) 6.7 × see shiny single grain surface. The matching fracture surface of the other sample showed a gray concentration area. No abnormalities were observed on the fractures of the remaining two samples.
Under the scanning electron microscope, the fracture was characterized by a sugar-like shape along the crystal fracture, indicating that the material was very brittle. The longitudinal and transverse specimens are taken at the fracture of the sandwich to inspect the inclusions, which are the coarse intergranular inclusions shown by the transverse specimens, and the longitudinally polished surfaces are large inclusions in the form of long strips, wherein the width (or thickness) of the single inclusions is about 125 Lm. Electron probe analysis of the main components of large inclusions w /%: Mn33, Cr12, Fe2, S38, Ca6. In the composite silicate inclusions wrapped in the shape of micro-fracture morphology regular manganese spinel, in addition to large inclusions In addition, the remaining inclusions are mostly concentrated and distributed along the crystal. From the above test results, it can be confirmed that the penetrating crack shown on the low-magnification test piece is not a true crack, but the large inclusion is caused by the acid etching and falling off, and has the same destructive effect as the crack.
Inclusion pattern in the fracture interlayer (polished state) 12.8 × strip-shaped inclusions in the fracture interlayer (polished state) 50 × 2.5 Microstructure examinations were taken on the surface of the broken bolt and the 1/4 diameter portion, respectively, and examined under an optical microscope. The surface of the bolt is tempered martensite + coarse upper bainite. The internal structure of the bolt is the same as that of the edge, and most of it is coarse upper bainite, which may be related to the slow cooling rate during quenching. The 2% nitric acid alcohol solution can show the surface of the fracture bolt surface structure 320 × dark phase, especially the grain boundary contour of the dark region is easy to be displayed. The use of picric acid and sodium dodecylbenzenesulfonate showed that the austenite grain size was grade 2, and the grain boundary was flattened, indicating that the bolt had been overheated during the heat treatment.
The remaining thread is hammered and broken, and the broken thread is observed by scanning electron microscopy. The fracture morphology and microstructure are the same as the broken bolt. Although the bolt was not further dissected, it can be concluded from the above test results that the thread brittle fracture is related to the superheat embrittlement.
It is analyzed and discussed that the three bolts are evenly distributed in three parts of 120° to each other to connect the converter body and the support ring. Therefore, when the converter is in any tilting position, the converter load can be transmitted to the support ring continuously and smoothly. Always keep the correct position of the converter body on the bracket. In addition, under design load conditions, the bolts are always subjected to vertical axial loads and are not subject to torsional and bending stresses. According to the design data, the maximum vertical load of the 120t converter body of Panzhihua Iron and Steel Co., Ltd. is 750t on the support ring, and the design safety factor is 24 according to the minimum section size (<280mm). According to the measured bolt strength, the total load capacity of the three bolts is P = 3 × F × Rb = 17890.8 t. However, the bolt is brittle under low stress conditions, and there are inevitable reasons.
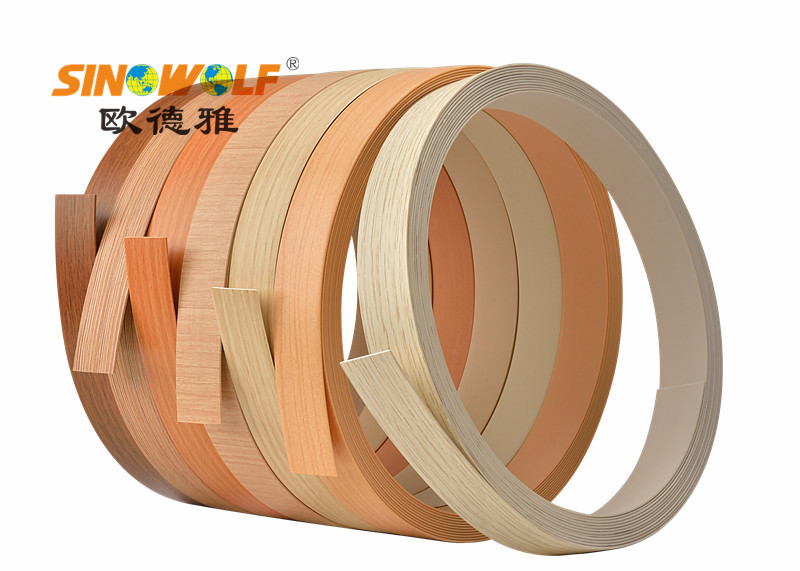
ABS Woodgrain Color Edge Banding:
1.Adopt quality ABS resin raw material, imported UV and ink. 2. ABS Wood Grain Edge Banding have matt+high gloss+emboss finish surface. 3.Customize size and color-more than 2000 Wood Color Edge Banding be produced.Size range 0.35-3.0mm thick and 12-620mm width. Above 98% matching to customer`s standard panel. 4.Eleven years ABS Edge Banding manufacture experience. 5.Strict quality control system and well after-sales service are promised:strict test during every step of ABS edge banding produce. 6.Won high praise from cooperated customers 7. We promise to only offer high quality edge banding.

ABS Woodgrain Color Edge Banding
ABS Woodgrain Color Edge Banding,Wood Grain ABS Edge Banding,ABS Edge Banding wood color,3mm ABS Wood Grain Edge Banding,China ABS edge banding manufacturer, ABS edge banding factory
Sinowolf Plastic Dekor Co., Ltd , http://www.sinowolfdekor.com
